
Hi beauties! It’s Carina from CarinaConnelly.com and I’m here to share my favorite three ways to style a side bun. Each style can be dressed up or dressed down and are the perfect way to keep your hair pulled up in a stylish way. Check out the easy-to-follow written tutorials for each look below, and follow along with the video to see the looks!
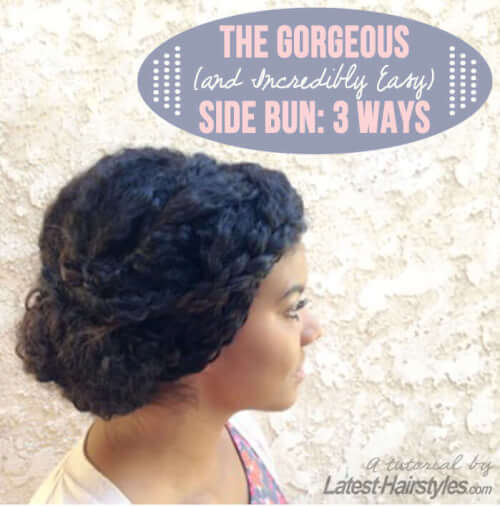
Classic Side Bun
Since I have naturally curly hair, I applied my favorite styling products and allowed my hair to dry naturally. If you have naturally straight hair, I recommend curling your hair prior to trying this tutorial. The curls will add movement and dimension to your side bun.
How to style:
- Create a side part and section off the front (from the top of your head to just behind your ear). Clip that hair out of the way.
- Pull the rest of your hair over to the side and secure in a ponytail.
- Take a medium to large section of the ponytail (depending on the thickness of your hair), and wrap it around fingers to create a loop. Secure loop to elastic with a bobby pin.
- Continue looping hair until all hair in ponytail is wrapped up.
- Unclip the top section. Taking medium-sized sections, gently twist hair and wrap around bun. Secure twist with a bobby pin.
- Continue until all hair in front is secured into side bun.
- Set side bun with hairspray.
Styling Tip:
When securing hair with a bobby pin, try to hook the bobby pin onto the elastic inside the bun. This will give the bobby pin something to hold onto and help your style hold longer!
Side Bun with Braid
Adding a braid is a super cute way to add texture to your side bun (and keep your bangs out of your eyes!). To achieve this style, you’ll follow steps 1-4 from the Classic Side Bun, plus a few extras.
How to style:
- Create a side part and section off the front (from the top of your head to just behind your ear) and clip that hair out of the way.
- Pull the rest of your hair over to the side and secure in a ponytail.
- Take a medium to large section of the ponytail (depending on the thickness of your hair), and wrap around fingers to create a loop. Secure loop to elastic with a bobby pin.
- Continue looping hair until all hair in ponytail is wrapped up.
- Unclip the top section. Starting near your part, create a simple three-strand French braid.
- Continue braid until you run out of hair.
- Secure braid to bun.
- Gently tug on strands of braid to loosen.
- Set style with hairspray.
Styling Tip:
Be careful not to make your braid too tight! If it’s too tight, gently tug on strands within the braid to loosen it. You might need to add additional bobby pins to keep the braid from coming loose.
Twisted Side Bun
Adding twists to your side bun creates a layering effect that looks absolutely gorgeous. Try twisting the front section or try it just the way I have for a look that’s perfect for any occasion.
- Start with your hair in a side ponytail and the front sectioned off.
- Unclip the front section and section off a smaller section just in front of the ear.
- Divide that section into two smaller sections and twist the sections around each other until your twist reaches ponytail holder.
- Attach the twisted section to your elastic with a bobby pin.
- Continue steps 3 and 4 until all hair in the front is twisted back.
- Grab a small section of the ponytail and twist it around your finger. Secure section to ponytail elastic.
- Continue twisting ponytail hair and securing until all hair is wrapped into a bun.
- Set style with hairspray.
Styling tip:
If you have naturally straight or fine hair, try adding a texturizing spray to your locks to give them texture and grittiness. This will help your style last longer.
Watch The Video:
There are so many ways to create a side bun! But, these are my favorites because they are super stylish and can be easily dressed up or down. Between trying these fab side buns, stop over at CarinaConnelly.com for more beauty chitchat, reviews and hair tutorials.